When I first started to experiment with Long Exposure Photography At Night I was awestruck at how a typical scene suddenly appeared like a fairytale. Lights transformed to glowing lines the water appeared soft as cotton and the stars looked to be brighter. In this article I'll share everything I've learned, so that you can create stunning night photographs as well, even if you're a total beginner.
What Is Long Exposure Photography?
Long exposure photography occurs the time I leave the shutter of my camera in place for an extended duration. Instead of snapping a quick photo, the camera captures more light. This makes moving objects such as clouds or cars appear smooth, soft or stretched. In the evening, this method assists me in capturing more brightness and stunning effects that our eyes can't see in normal light.
Why It Works So Well at Night
Dark night scenes are difficult to see and the camera requires more time to capture light. Long exposure lets me:
- Capture bright car light trails
- Make stars appear like lines in the sky
- Smooth the water in oceans or rivers
- Lighten up dark buildings and streets
It transforms ordinary places into breathtaking images.
Read also: Wildlife Photography Tips for Beginners – Easy Guide to Capture Stunning Shots
The Basic Camera Settings Explained Simply
1. Shutter Speed
This is the length of time that the camera remains open.
- Speed shutter is the same as normal picture
- Long exposure = slow shutter photos
For night-time shots I generally employ 5-30 seconds or more.
2. Aperture
This is how wide the lens can be opened.
- Large opening (small number of f-number) means more light
- Small opening (large number of f) means less light
Night shots are often good when using f/5.6 to F/11..
3. ISO
This increases the camera's sensitivity to light.
- ISO = low ISO = clear image
- High ISO means more brightness, However, there is also greater noise
I typically tend to keep my ISO at around 100-1600 at night.
The Gear I Use for Night Long Exposure
1. A Camera With Manual Mode
Mirrorless cameras or DSLRs are the best choice. Certain smartphones can also perform long exposures using apps that are designed specifically for it.
2. A Strong Tripod
The camera is prevented from shaking. Even a small shake can cause the image to blur.
3. Remote Shutter or Timer
The camera's movement can be shaken by pressing it. This is why I use an external remote or a two-second timer.
4. A Wide-Angle Lens
Ideal for taking pictures of large images like skylines or city structures.
5. Optional Tools
- Flashlights to walk in safety
- Extra batteries
- ND filters to block very bright areas
Read also: How To Capture Motion In Photography
How I Choose the Best Location
I often think of two aspects:
1. Safety First
I don't go to dark or dangerous areas on my own.
2. Finding Interesting Light
Good places to be found include:
- Moving cars and busy roads
- Bridges, roofs or roofs
- Rivers or lakes
- Dark areas in star photographs
Apps that can help me:
- Maps of light pollution
- Weather apps
- Moon phase trackers
My Step-by-Step Process for a Night Long Exposure Photo
Step 1 -- Set Up the Tripod
I set my camera onto a steady surface.
Step 2 -- Choose Manual Mode
Long exposure requires full control.
Third Step -- Begin with these simple settings:
- Shutter speed: 10 seconds
- Aperture: f/8
- ISO: 400
Step 4 -- Focus Manually
I make sure to lock the focus so it won't shift.
Step 5 -- Use the Timer or Remote
This ensures that the image is clear and unshakeable.
Step 6 -- Review and Adjust
If the image is dark, I raise ISO or reduce the shutter speed (like twenty seconds). If the image is too light, reduce ISO or increase the speed of the shutter.
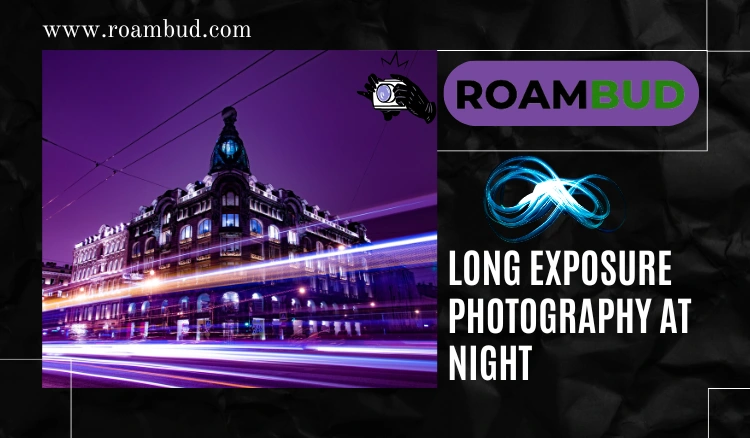
How I Capture City Light Trails at Night
Light trails are among my favourite effects.
Here's how I did it:
- Find a street that has moving vehicles
- Utilize a high spot, like an overpass
- Set the shutter timer for between 10 and 30 seconds.
- Keep ISO low (100-200)
Cars make long, shining lines, while structures remain clear.
How I Capture Stars and Star Trails
Stars appear beautiful when exposed to long exposure.
Sharp Stars:
- Use 10-20 seconds
- High ISO (800-1600)
- Wide aperture (f/2.8-f/4)
- Make use of extremely lengthy time exposures ( 2-5 minutes)
- Take a series of 30-second pictures and then stack them
Darker areas that aren't surrounded by the city lights are ideal.
Long Exposure Water Photography at Night
The water looks soft and beautiful when I use a slow exposure.
The best settings:
- Shutter: 10-15 seconds
- Aperture: f/8-f/11
- ISO: 200-600
Great for lakes, beaches and rivers at night.
Common Problems I Faced
1. Picture Too Bright
- Increase the shutter speed
- Use smaller aperture (higher f-number)
- Lower ISO
2. Picture Too Noisy
- Use lower ISO
- You can enable "Noise Reduction" in camera
3. Blurry Photos
- Check tripod stability
- Use a remote or a timer
4. Lens Fogging Up
- Cap your lens until you're shooting
- The camera should adjust to the temperature.
Safety Tips I Always Follow at Night
- I never go alone to dark places.
- I have a mobile phone as well as a flashlight.
- I steer clear of busy streets or unsafe roofs.
- I am aware of my surroundings and the environment.
- I secure my equipment with the straps for my camera.
Security is always more important than photos.
Read also: Best Camera For Travel Photography 2025
How I Edit My Night Long Exposure Photos
Editing the photo helps it to shine even more.
My simple editing steps:
- Adjust White balance (night photos appear too blue or yellow)
- The contrast should be increased slightly.
- Reduce noise
- Sharpen the image
- Adjust brightness gradually
I attempt to keep the image natural.
Fun Practice Projects for You
Here are some ideas for beginners:
1. Car Light Trails on a Busy Road
Explore other shutter speeds.
2. Star Trails in a Dark Area
Utilize very long exposures or stacking.
3. City Skyline With Reflections
Water reflections look stunning.
4. Moving Clouds at Night
Clouds form soft streaks of light in the sky.
5. Light Painting
Make use of an LED to draw shapes in the darkness.
Conclusion on Long Exposure Photography At Night
Long Exposure Photography At Night is among the most thrilling ways to experiment with photography. When I first began I had no idea what to expect but through simple steps and practice, I gradually discovered how to create stunning night photographs. Anyone, even beginners can make stunning nighttime photographs with a little patience, the proper settings, and a bit of imagination.
FAQ's: Long Exposure Photography At Night
1. What shutter speed is the best in the night?
Usually 10-30 minutes depending on the lighting.
2. Can I make long exposure using my smartphone?
Yes! Numerous phones come with long exposure mode or apps.
3. Why are my photos grainy?
High ISO produces noise. Make sure you use the lowest ISO that you can.
4. Do I need expensive gear?
No. A basic camera that has the manual mode as well as a tripod will be sufficient.